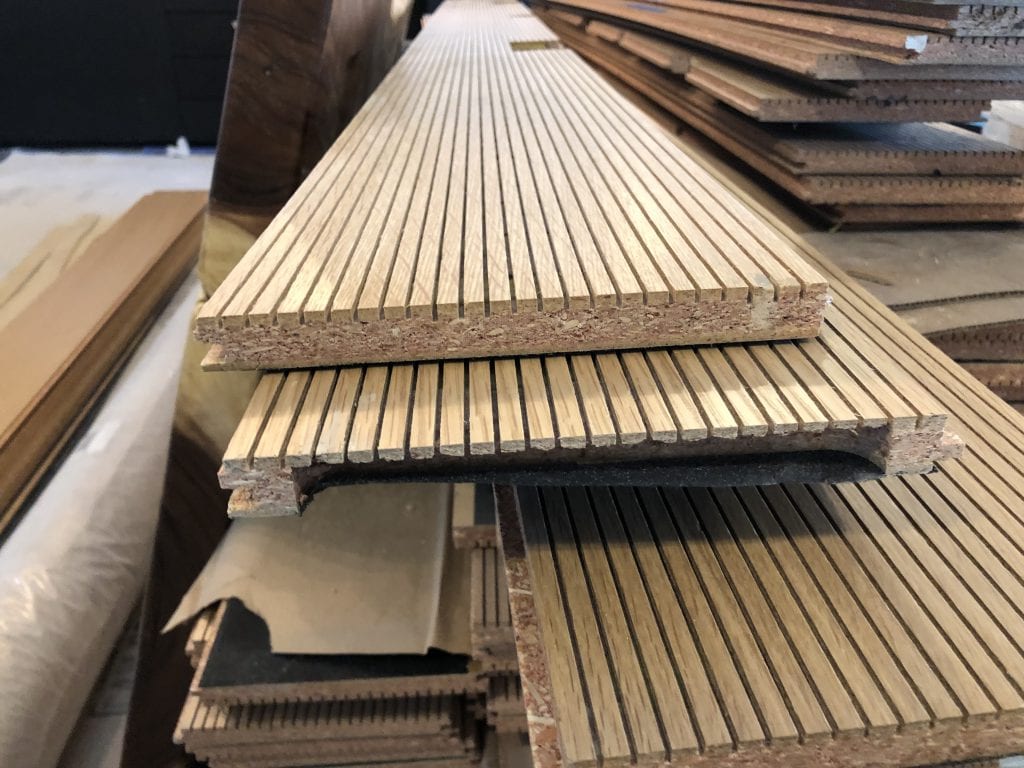
Acoustic planks and acoustic tiles can be tricky to cut in the field because of the vulnerable “teeth” that make up acoustic wood products. By using the right tools and techniques, field cutting can be accomplished successfully. (“Teeth” are the results of grooves cut into a wood panel which in turn intersect a hole drilled in the back of the panel. This combination groove and hole creates an opening for sound to pass through the panel.)
By the end of this article, we will also go over how to cut holes in acoustic tile or planks. But first, we need to lay some foundations about tools, taping, and of course tips to do it right the first time.
We recommend using a Bosch Jig Saw Mdl. #JS470E. It has variable speed control with the ability to run the blade without oscillation, which helps limit chip-out and damage. Use the Bosch t101br blades as they are a reverse-cut blade. The reverse cut pushes down towards the material and prevents chip-out and damage since it cuts with a less aggressive upstroke. We have had good luck with this combination and use this saw and blade combo when cutting acoustic planks here in the factory. If you prefer or intend to use a compound miter saw for your cuts, make sure the face is up on the bed of the saw. The same with a circular saw–make sure the face is up.
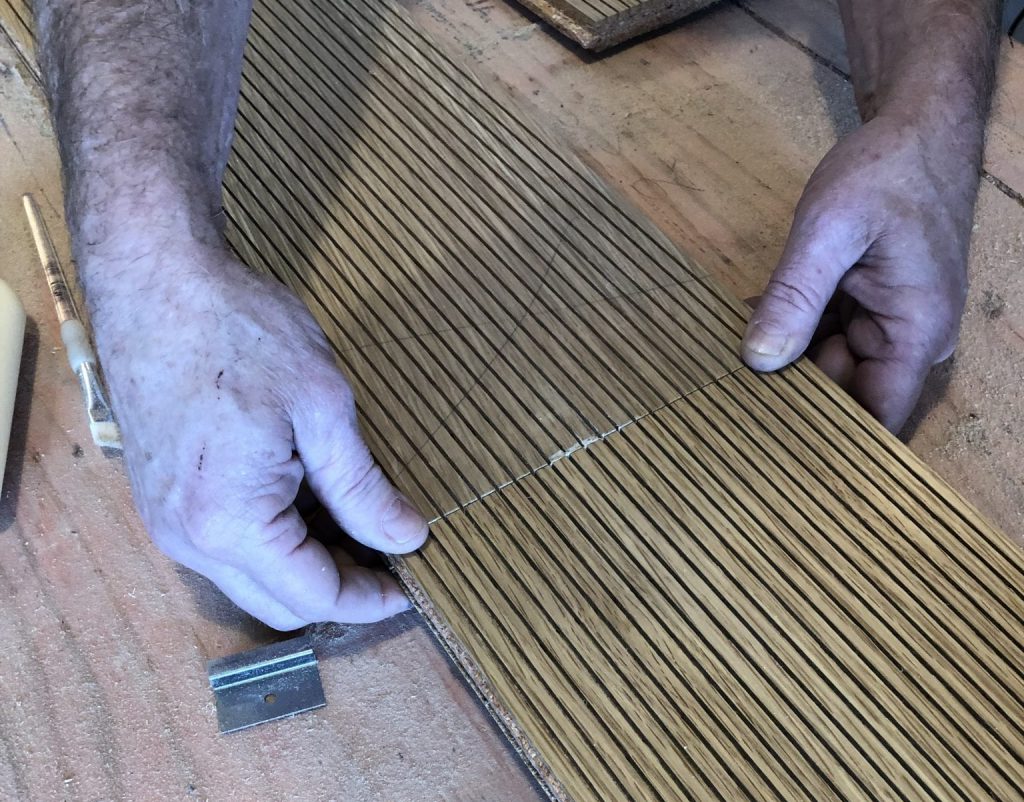
Taping the planks prior to cutting has many advantages and is our suggested approach. Use a good quality painter’s tape (e.g., 3M Scotch Blue). Apply the tape wherever a cut is needed. It will help prevent chip-out and damage to the “teeth” of the acoustic plank. Cover the area where the foot of the saw will travel to avoid surface scratches. Cut from the face of the plank to control your cut and provide accuracy.

After taping the surface, draw the shape and location of the penetration to be cut. If cutting a perimeter, you can draw a straight line if shortening the plank, or an angle line if cutting an angle. This scribed line will allow you to double-check your measurements and placement before beginning the cut. It will also give you a scribe line to follow across the kerfs to ensure an accurate cut is made.
You can make your straight cuts with any of the saws described in this article. Clamp a straight edge to improvise a reference fence. Penetration cuts, however, are best made with the jig saw. You will need to drill at least a 3/8” hole inside your scribe lines to pass the blade through to start your cut. To drill the hole, a quality spade, or butterfly bit, is best, but a brad point style twist bit can be used as well.

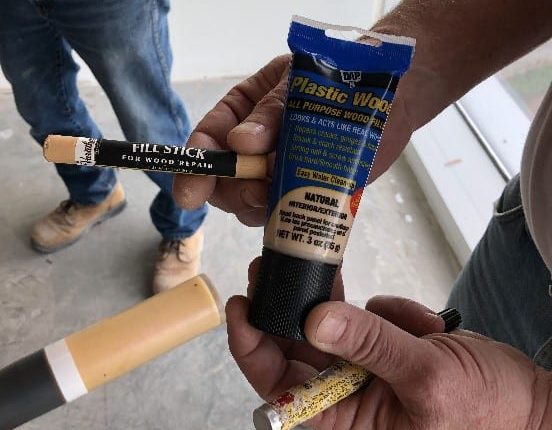
You may need a good assortment of touch-up products to finish any chip-out or damage. We recommend using a close color-matched oil-based putty for the larger veneer chip-outs. You can use colored pencils for the smaller veneer chips. Close color matching is necessary here as well. When using a colored pencil, make sure you move the pencil with the grain to avoid additional chip-out and to blend the repair with the natural grain patterns.

For broken acoustic plank “teeth,” glue them back in place with a typical wood glue, assuming you have preserved the broken piece. One advantage of the painter’s tape is that it will retain these pieces should one break free. It is possible to re-align the veneers and glue the particle board back together. First, dry fit the piece and clear any loose particles from both surfaces. Second, apply the glue. Be sparing with the glue. Third, use the painter’s tape to hold it in place while it dries. Super glue can also be used but “dry fitting” and clearing debris is very important with super glue. It is not recommended to use the painter’s tape in combination with the super glue. Hold the piece in place with your fingers or a small squeeze clamp until the superglue sets up.
Once the piece has been replaced and glued in place, you can then look at the veneer joinery. If it is raised a bit above the surface, this can be tapped down (‘smashed’) by placing a clean block of solid wood over the area and tapping the block with a hammer. After flattening the veneer joinery, you can blend it in with touch-up products, as described above.
This information will work for straight cuts as well as curved cuts. If you are doing a lot of straight cuts, a Compound Miter saw with an 80-toothed carbide ATB (alternating tooth bevel) style blade will work best. Painter’s tape can be used as a precautionary measure against chip-out. However, the way the saw is used is more important. The acoustic plank should be face-up on the saw bed and a new blade installed on the saw. Let the saw blade come up to full speed before starting the cut. Then the saw should be pulled very slowly through the acoustic plank to allow the blade to clear all chips and leave a clean, crisp edge. If using a sliding compound miter saw, a very shallow score can be cut first and then follow through at full thickness.
How do you cut holes in acoustic planks or tiles?
Here are a few rules to follow when cutting holes in an acoustic tile:
- You want to use good tools and move slowly through the cut.
- I recommend using a Bosch Jig Saw and T101BR blades. Use these blades only as they are reverse cut. Cutting downward into the veneer will lessen the risk of chip-out.
- Make all cuts from the face of the tile, not from the back.
- Painter’s tape should be applied to the cutting area. This will help avoid chip-out of the veneer as well as scratches from the saw’s foot.
Here is an outline of the process I would recommend:
- To start, locate the area where a penetration needs to be made and cover it with painter’s tape. You can then trace the penetration shape onto this tape.
- Drill a pilot hole through the taped area approximately ½” in diameter to allow the saw blade to fit through.
- Set the variable speed to 4 on the Bosch Jig saw and begin cutting in a slow and deliberate fashion. If there is an oscillation adjustment, set it to neutral or no oscillation.
- After the cut is made, remove the tape by peeling it up slowly and toward the penetration.
- Using a sanding sponge lightly, sand the cut edges to “file” down any feathered veneer.
- Seal the exposed core with the touch-up finish provided with your project.
I hope this information helps you make your cuts easily and to the quality you desire.
Have any other question? Get ahold of us. We love to share what we know.
Want a free sample? We do that too.
Want to see some cool videos?


